Docker复习

- Docker - mac 安装 -> https://www.docker.com - Container 容器 - 运行代码的隔离环境,是被隔离的进程 - 文件系统被隔离 - 网络被隔离 - 进程空间被限制 - 资源被限制 - 共享宿主机内核 - 启动速度≈启动一个进程(速度快) - 是镜像的运行实例 - 包含内容 - 主进程 - 可写层 - 网络接口 - 挂载点 - 容器应该是单一职责进程 - ![](https://an-img.oss-cn-hangzhou.aliyuncs.com/2026/02/05/20260205220658623.png,340,170) - 打开端口 - ![](https://an-img.oss-cn-hangzhou.aliyuncs.com/2026/02/05/20260205221048513.png,300,60) - NetWork 网络 - Docker 默认创建虚拟网络 - 容器间可以用容器名互相访问,Docker 自动做服务发现 - Volumn 持久化数据 - volumnes (数据卷) - 是本地文件系统的一个由 docker 管理的位置 - 可以在容器被删除后仍然保留数据 - 容器的默认文件系统是临时、可销毁的,删除容器 = 数据丢失 - 容器内路径 <-> 宿主机目录 - 数据库容器一定要用 volumn - Image 镜像 - 不是压缩包,是只读的文件系统模板 - 包含内容 - 程序 - 依赖 - 运行环境 - 配置 - 是程序快照 - 容器从镜像中创建出来 - 实验 - 拉取并运行第一个容器 - docker run hello-world - ![](https://an-img.oss-cn-hangzhou.aliyuncs.com/2026/02/06/20260206165323329.png,500,120) - docker 自动执行步骤 - 拉镜像 - 创建容器 - 运行程序 - 退出容器 - 运行一个长期存活的容器 - docker run -it ubuntu bash - ![](https://an-img.oss-cn-hangzhou.aliyuncs.com/2026/02/06/20260206170740991.png,400,80) - 进入容器 shell - 执行 ps aux - ![](https://an-img.oss-cn-hangzhou.aliyuncs.com/2026/02/06/20260206171016883.png,100,30) - 仅仅只有两个进程,说明不是完整的 linux 系统 - exit 退出 - 容器的主进程就是 bash, bash 退出,容器就结束 - 容器的生命周期 = 主进程生命周期 - 观察容器生命周期 - created -> running -> stopped -> removed - docker run -d nginx (后台启动 Nginx) - ![](https://an-img.oss-cn-hangzhou.aliyuncs.com/2026/02/06/20260206172849914.png,400,250) - 查看容器 - docker ps - ![](https://an-img.oss-cn-hangzhou.aliyuncs.com/2026/02/06/20260206172939496.png,400, 50) - 停止容器 - docker stop <container_id> - ![](https://an-img.oss-cn-hangzhou.aliyuncs.com/2026/02/06/20260206173108853.png,400,150) - 容器仍然存在,只是 stopped - 删除容器 - docker rm <container_id> - 删除容器 vs 删除镜像 - 查看镜像 - ![](https://an-img.oss-cn-hangzhou.aliyuncs.com/2026/02/06/20260206173610615.png,400,150) - 删除镜像 - docker rmi nginx - 容器数据丢失实验 - docker run -it ubuntu bash - echo "hello" > test.txt - exit - ![](https://an-img.oss-cn-hangzhou.aliyuncs.com/2026/02/06/20260206173816171.png,400,80) - 重新进入 docker run -it ubuntu bash - ![](https://an-img.oss-cn-hangzhou.aliyuncs.com/2026/02/06/20260206173901539.png,400,80) - 文件消失,因为文件系统是临时层,删除容器后,数据就没了 - 使用 volume 持久化数据 - docker run -it -v mydata:/data ubuntu bash - mydata 是 docker 管理的数据卷,数据存在容器外,容器销毁也不影响 - ![](https://an-img.oss-cn-hangzhou.aliyuncs.com/2026/02/06/20260206174435990.png,400,150) - 容器间通信 - 创建网络 docker network create mynet - 运行数据库 docker run -d --name db --network mynet nginx - 运行另外一个容器 docker run -it --network mynet ubuntu bash - 访问 nginx - apt update - apt install curl - curl db - ![](https://an-img.oss-cn-hangzhou.aliyuncs.com/2026/02/06/20260206175747288.png,500,200) - dockerfile 部署项目 - 创建项目 - ![](https://an-img.oss-cn-hangzhou.aliyuncs.com/2026/02/06/20260206180229486.png,800,350) - 写一个 Dockerfile - ![](https://an-img.oss-cn-hangzhou.aliyuncs.com/2026/02/06/20260206201253617.png,400,300) - FROM 指定基础镜像,alpine=极小体积 Linux - WORKDIR /app 相当于 cd /app,后续所有操作都在这个目录,容器内工作目录标准写法 - COPY 把当前目录复制进镜像,左边宿主机,右边容器 - 打包的是代码 + 文件 - EXPOSE 声明端口,但是不开放,真正开放端口在 docker run - CMD 容器启动时执行的命令,容器只运行这个进程 - 构建镜像 - docker build -t my-app . - ![](https://an-img.oss-cn-hangzhou.aliyuncs.com/2026/02/06/20260206205413049.png,400,300) - 查看镜像 - ![](https://an-img.oss-cn-hangzhou.aliyuncs.com/2026/02/06/20260206205442327.png,400,80) - 运行容器 - docker run -p 3000:3000 my-app - 镜像分层 - Docker 每一行 Dockerfile 都生成一个 layer - 如果 RUN npm install 代码没变,Docker 会复用缓存 - 优化写法 - ![](https://an-img.oss-cn-hangzhou.aliyuncs.com/2026/02/06/20260206205757131.png,400,300) - .dockerignore - 可以不把无关文件复制进镜像 - 停止并删除容器 - ![](https://an-img.oss-cn-hangzhou.aliyuncs.com/2026/02/06/20260206205935054.png,500,100) - 容器是消耗品,应该删了重建,才是 Docker 的正确用法 - multi-stage build - 目标 - 让最终镜像只包含运行所需内容 - 不带编译工具、源码、构建缓存、开发垃圾 - 定义 - 在一个 Dockerfile 里面使用多个 FROM 阶段 - 前面阶段用来构建,最后阶段只保留运行产物 - 拆解 - ![](https://an-img.oss-cn-hangzhou.aliyuncs.com/2026/02/06/20260206210549327.png,500,400) - builder 阶段,专门用来编译、构建、打包 - COPY --from 从 builder 阶段复制文件,只会复制构建产物 - runtime 阶段,最终镜像只包含 dist 运行文件 + node runtime - 国内镜像配置 - ![](https://an-img.oss-cn-hangzhou.aliyuncs.com/2026/02/06/20260206153717824.png,500,200) 容器原理

二月 6, 2026

Redis 复习

- Redis - 环境安装 - docker run -d --name redis -p 6379:6379 redis - docker exec -it redis redis-cli (进入容器安装) - 安装 redis-cli - brew install redis - redis-cli --version - 连接 redis - redis-cli -h 127.0.0.1 -p 6379 - ping - PONG - Redis 定位 - 性能:减少 DB 压力 - 并发:原子操作 - 临时数据:状态、计数、锁 - 不适合场景 - 强一致性核心数据 - 超大对象 - 长期冷数据 - 基本特性 - 命令执行是单线程 - 网络 I/O 是多路复用 - 核心数据结构 - 清空数据 - FLUSHDB - 查看有多少 key - DBSIZE - ![](https://an-img.oss-cn-hangzhou.aliyuncs.com/2026/02/06/20260206215227359.png,100,35) - String - 基本 GET/SET - ![](https://an-img.oss-cn-hangzhou.aliyuncs.com/2026/02/06/20260206215323487.png,130,35) - 带过期时间 TTL - ![](https://an-img.oss-cn-hangzhou.aliyuncs.com/2026/02/06/20260206215527894.png,130,80) - EX 是秒,PX 是毫秒 - TTL 返回剩余的秒数 - TTL = -1: 存在但没过期时间,-2 不存在 - 原子自增(计数器) - ![](https://an-img.oss-cn-hangzhou.aliyuncs.com/2026/02/06/20260206215723437.png,130,90) - List - 左进右出:队列 FIFO - ![](https://an-img.oss-cn-hangzhou.aliyuncs.com/2026/02/06/20260206215909155.png,130,150) - 阻塞队列 - ![](https://an-img.oss-cn-hangzhou.aliyuncs.com/2026/02/06/20260206220103319.png,640,54) - BRPOP key timeout - key 要监听的队列 - timeout 最大等待时间(s) 0=无限等待,5=最多等5s - ![](https://an-img.oss-cn-hangzhou.aliyuncs.com/2026/02/06/20260206220135317.png,640,54) - Hash (存对象) - 写入写出 - ![](https://an-img.oss-cn-hangzhou.aliyuncs.com/2026/02/06/20260206220545889.png,500,420) - Set (去重,关系,共同好友) - 去重集合 - ![](https://an-img.oss-cn-hangzhou.aliyuncs.com/2026/02/07/20260207000117913.png,400,200) - 交集、并集、差集 - ![](https://an-img.oss-cn-hangzhou.aliyuncs.com/2026/02/07/20260207000306600.png,400,200) - ZSet (排行榜:积分、热度、TopN) - ZSet = Set + Score - 添加与排序读取 - ![](https://an-img.oss-cn-hangzhou.aliyuncs.com/2026/02/07/20260207000515210.png,420,370) - 增加分数与查询名次 - ![](https://an-img.oss-cn-hangzhou.aliyuncs.com/2026/02/07/20260207142718618.png,320,110) - TOPN - ![](https://an-img.oss-cn-hangzhou.aliyuncs.com/2026/02/07/20260207142916620.png,200,40) - 按成员删除 - ![](https://an-img.oss-cn-hangzhou.aliyuncs.com/2026/02/10/20260210171017828.png,360,94) - 按 score 范围删除 - ![](https://an-img.oss-cn-hangzhou.aliyuncs.com/2026/02/10/20260210171755055.png,377,128) - 按排名删除 - ![](https://an-img.oss-cn-hangzhou.aliyuncs.com/2026/02/10/20260210172016602.png,466,343) - Bitmap (用户签到/布尔状态) - 场景:统计 2026-02 月的签到情况 - 思路 - 一个用户 = 1 个 Bitmap - 一天 = 1 bit - 签到 = 1 - 未签到 = 0 - key = sign:用户 ID:202602 - offset = 第几天 - 1 - 基础实验 - 第一天签到 + 第二天签到 - ![](https://an-img.oss-cn-hangzhou.aliyuncs.com/2026/02/10/20260210164227735.png,353,78) - 查询某天是否签到 - ![](https://an-img.oss-cn-hangzhou.aliyuncs.com/2026/02/10/20260210164101061.png,330,37) - 统计本月签到天数 - ![](https://an-img.oss-cn-hangzhou.aliyuncs.com/2026/02/10/20260210164306694.png,342,39) - HyperLogLog (UV/去重统计) - 场景:统计某天网站 UV - 模拟用户访问 - ![](https://an-img.oss-cn-hangzhou.aliyuncs.com/2026/02/10/20260210164510486.png,323,117) - 统计 UV - ![](https://an-img.oss-cn-hangzhou.aliyuncs.com/2026/02/10/20260210164530550.png,294,36) - 特点 - 内存:固定 12KB - 准确度:99% - Geo (地理位置/附近的人) - 场景 - 查找 5km 内的商家 - ZSet + GeoHash - 添加地理位置 - ![](https://an-img.oss-cn-hangzhou.aliyuncs.com/2026/02/10/20260210165000620.png,441,116) - 查看两点距离 - ![](https://an-img.oss-cn-hangzhou.aliyuncs.com/2026/02/10/20260210165107321.png,441,50) - 查询附近 1500km 的城市 - ![](https://an-img.oss-cn-hangzhou.aliyuncs.com/2026/02/10/20260210165141208.png,431,58) - 带距离排序 - ![](https://an-img.oss-cn-hangzhou.aliyuncs.com/2026/02/10/20260210165203816.png,431,110) - 通用排查命令 - 查看 Key - ![](https://an-img.oss-cn-hangzhou.aliyuncs.com/2026/02/07/20260207143038160.png,100,23) - 一般生产环境中不建议用 KEYS,建议使用 SCAN - 查看类型/是否存在 - ![](https://an-img.oss-cn-hangzhou.aliyuncs.com/2026/02/07/20260207143201412.png,100,40) - 删除 key - ![](https://an-img.oss-cn-hangzhou.aliyuncs.com/2026/02/07/20260207143312380.png,100,22) - 缓存系统实战 - 目标 - 实现用户查询接口: Get /user/{id} - 架构 - Controller -> Service -> Redis -> FakeDB - 逻辑 - 先查 Redis - 没命中查数据库 - 写回 Redis - 加 TTL - 防穿透 + 防击穿 - Java 实现 - 初始化项目 https://start.spring.io - ![](https://an-img.oss-cn-hangzhou.aliyuncs.com/2026/02/07/20260207144538747.png,240,290) - ![](https://an-img.oss-cn-hangzhou.aliyuncs.com/2026/02/07/20260207145053224.png,100,22) - 配置 RedisTemplate - ![](https://an-img.oss-cn-hangzhou.aliyuncs.com/2026/02/07/20260207162941344.png,420,200) - 编写 Service - ![](https://an-img.oss-cn-hangzhou.aliyuncs.com/2026/02/07/20260207164953341.png,620,900) - 编写 Controller - 访问 localhost:8080/user/1 - 查看 redis 内容 - ![](https://an-img.oss-cn-hangzhou.aliyuncs.com/2026/02/07/20260207163242027.png,200,30) - 压测 - ab -n 10000 -c 100 http://localhost:8080/user/1 - 秒杀系统实战 - 项目结构 - ![](https://an-img.oss-cn-hangzhou.aliyuncs.com/2026/02/07/20260207202201922.png,180,560) - 库存扣减 - ![](https://an-img.oss-cn-hangzhou.aliyuncs.com/2026/02/07/20260207202254845.png,500,500) - ![](https://an-img.oss-cn-hangzhou.aliyuncs.com/2026/02/07/20260207202428795.png,400,190) - 消息队列 - ![](https://an-img.oss-cn-hangzhou.aliyuncs.com/2026/02/08/20260208103843531.png,600,200) - ![](https://an-img.oss-cn-hangzhou.aliyuncs.com/2026/02/08/20260208103947825.png,200,400) - 分布式锁 - ![](https://an-img.oss-cn-hangzhou.aliyuncs.com/2026/02/08/20260208104108604.png,600,660) - 限流 - ![](https://an-img.oss-cn-hangzhou.aliyuncs.com/2026/02/08/20260208104251769.png,600,300) - service - ![](https://an-img.oss-cn-hangzhou.aliyuncs.com/2026/02/08/20260208104346930.png,200,300) - controller - ![](https://an-img.oss-cn-hangzhou.aliyuncs.com/2026/02/08/20260208104412950.png,200,250) - 压测测试 - ab -n 1000 -c 200 http://localhost:8080/seckill/1 - 进阶 - 滑动窗口限流 - lua - ![](https://an-img.oss-cn-hangzhou.aliyuncs.com/2026/02/08/20260208174051889.png,400,600) - ![](https://an-img.oss-cn-hangzhou.aliyuncs.com/2026/02/08/20260208174120075.png,400,120) - service - ![](https://an-img.oss-cn-hangzhou.aliyuncs.com/2026/02/08/20260208174212781.png,250,300) - 令牌桶 - lua - ![](https://an-img.oss-cn-hangzhou.aliyuncs.com/2026/02/08/20260208183418934.png,200,600) - 持久化 - RDB(快照) - 机制:周期性生成内存快照文件 dump.rdb - 优点:恢复快、文件紧凑 - 缺点:可能丢失最近一次快照之后的数据 - 关键点:fork 触发 COW,会带来短暂的延迟和额外内存占用 - AOF(追加日志) - 机制:写命令追加到 appendonly.aof - 刷盘策略 - appendfsync always:每条都写 fsync,最安全最慢 - everysec:每秒 fsync,最常用,最多丢 1s - no:交给 OS,风险高 - AOF 重写:压缩日志,避免无限膨胀 - 混合持久化 - AOF 前半段是 RDB 快照,后半段是增量 AOF - 实验一:只开 RDB,模拟宕机恢复 - 只启用 RDB 快照 - 编写配置文件 redis-rdb.conf - ![](https://an-img.oss-cn-hangzhou.aliyuncs.com/2026/02/08/20260208204018291.png,300,200) - 启动 redis 容器 - mkdir -p ./redis-data - docker rm -f redis-rdb 2>/dev/null - ![](https://an-img.oss-cn-hangzhou.aliyuncs.com/2026/02/08/20260208212630821.png,300,100) - 验证 docker logs redis-rdb --tail 20 - 进入容器 - docker exec -it redis-rdb redis-cli - ![](https://an-img.oss-cn-hangzhou.aliyuncs.com/2026/02/08/20260208212952482.png,200,320) - 写入大量数据 - ![](https://an-img.oss-cn-hangzhou.aliyuncs.com/2026/02/08/20260208213207221.png,200,40) - 观察 persistence - ![](https://an-img.oss-cn-hangzhou.aliyuncs.com/2026/02/08/20260208213348306.png,300,620) - 手动触发 BGSAVE - 制造快照后的新增数据(丢失窗口) - ![](https://an-img.oss-cn-hangzhou.aliyuncs.com/2026/02/08/20260208213600877.png,300,30) - 强制宕机 - docker kill -s KILL redis-rdb - 重启 redis - docker start redis-rdb - ![](https://an-img.oss-cn-hangzhou.aliyuncs.com/2026/02/08/20260208213747156.png,320,270) - 验证 rdb 文件 - ![](https://an-img.oss-cn-hangzhou.aliyuncs.com/2026/02/08/20260208213916814.png,200,50) - 实验 2:只开 AOF,验证刷盘策略差异 - 清理旧容器和目录 - docker rm -f redis-aof 2>/dev/null - rm -rf ./redis-aof-data - 准备三份配置 - ![](https://an-img.oss-cn-hangzhou.aliyuncs.com/2026/02/08/20260208220151934.png,320,590) - 清空数据&启动 redis - ![](https://an-img.oss-cn-hangzhou.aliyuncs.com/2026/02/08/20260208220813971.png,550,130) - 检查 AOF 开启 - ![](https://an-img.oss-cn-hangzhou.aliyuncs.com/2026/02/08/20260208221351700.png,570,220) - 写入负载 + 强制关闭 - ![](https://an-img.oss-cn-hangzhou.aliyuncs.com/2026/02/08/20260208221604525.png,150,40) - docker kill -s KILL redis-aof - 重启 Redis - docker start redis-aof - 查看计数 - ![](https://an-img.oss-cn-hangzhou.aliyuncs.com/2026/02/08/20260208221709710.png) - 
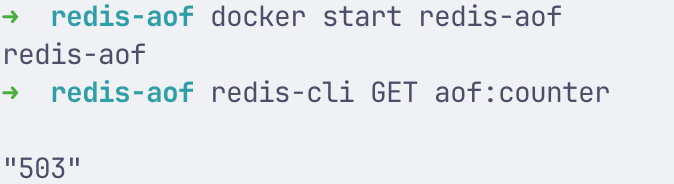
实验 3:AOF rewrite 触发与观测 - auto-aof-rewrite-percentage 100 - auto-aof-rewrite-min-size 64mb - 主从复制 - 目的:读扩展、数据冗余、高可用 - 全量复制:第一次同步或者 backlog 不够时 - 增量复制(PSYNC):短线重连后从 backlog 补差异 - 实验 1:搭主从并验证数据一致 - 启动 Master - ![](https://an-img.oss-cn-hangzhou.aliyuncs.com/2026/02/08/20260208225457359.png,200,40) - 启动 Replica - 创建并加入网络 - docker network create redis-net 2>/dev/null - docker network connect redis-net redis-master - 启动 replica 并加入网络 - ![](https://an-img.oss-cn-hangzhou.aliyuncs.com/2026/02/08/20260208232745496.png,250,50) - 查看复制状态 - ![](https://an-img.oss-cn-hangzhou.aliyuncs.com/2026/02/08/20260208233441611.png,400,400) - 验证数据一致性 - 主库写入 + 从库读取 - ![](https://an-img.oss-cn-hangzhou.aliyuncs.com/2026/02/08/20260208233706250.png,330,260) - 验证从库默认只读 - ![](https://an-img.oss-cn-hangzhou.aliyuncs.com/2026/02/08/20260208233757628.png,300,70) - 查看复制延迟 - ![](https://an-img.oss-cn-hangzhou.aliyuncs.com/2026/02/08/20260208233852945.png,100,20) - 排障 INFO replication - 哨兵 Sentinel (高可用) - 目的:监控、选主、故障转移、通知客户端 - 核心:主观下线、客观下线、选举与 failover - 客户端连接地址:不用写死 master 地址,而是通过哨兵获取当前 master - 实验:搭建 1 主 2 从+ 3 Sentinel - 准备目录 - mkdir -p redis-sentinel-lab/{conf,data} - 准备 Redis 配置 - master 配置 - ![](https://an-img.oss-cn-hangzhou.aliyuncs.com/2026/02/09/20260209102606425.png,200,90) - replica 配置 - ![](https://an-img.oss-cn-hangzhou.aliyuncs.com/2026/02/09/20260209102646643.png,150,120) - sentinel 配置 - ![](https://an-img.oss-cn-hangzhou.aliyuncs.com/2026/02/09/20260209201652255.png,500,400) - quorum 2:3 个 sentinel 里至少 2 个认为 master 有问题,才会进入客观下线/转移流程 - down-after-milliseconds:5s 没有响应就 SDOWN。 - docker-compose 启动 - ![](https://an-img.oss-cn-hangzhou.aliyuncs.com/2026/02/09/20260209103212388.png,400,220) - ![](https://an-img.oss-cn-hangzhou.aliyuncs.com/2026/02/09/20260209103505779.png,200,150) - ![](https://an-img.oss-cn-hangzhou.aliyuncs.com/2026/02/09/20260209103544585.png,500,40) - 验证主从复制 - ![](https://an-img.oss-cn-hangzhou.aliyuncs.com/2026/02/09/20260209103652649.png,350,100) - redis-cli -h 127.0.0.1 -p 6379 -a 123456 INFO replication - redis-cli -h 127.0.0.1 -p 6380 -a 123456 INFO replication - redis-cli -h 127.0.0.1 -p 6381 -a 123456 INFO replication - 验证写主从一致性 - ![](https://an-img.oss-cn-hangzhou.aliyuncs.com/2026/02/09/20260209103756350.png,350,100) - 验证 Sentinel 监控是否生效 - ![](https://an-img.oss-cn-hangzhou.aliyuncs.com/2026/02/09/20260209201810208.png,200,800) - 查看主库信息 redis-cli -p 26379 SENTINEL master mymaster - 查看从库信息 redis-cli -p 26379 SENTINEL slaves mymaster - 实验:故障演练 - 写入测试数据,验证切主后数据仍然可写 - ![](https://an-img.oss-cn-hangzhou.aliyuncs.com/2026/02/09/20260209202049854.png,400,150) - 观察主从拓扑 - ![](https://an-img.oss-cn-hangzhou.aliyuncs.com/2026/02/09/20260209202140865.png,900,300) - 查看 Sentinel 实时日志 - docker compose logs -f --tail 200 sentinel-1 - 模拟主库宕机 - docker kill -s KILL $(docker compose ps -q redis-master) - 等待故障转移完成(5-15s) - ![](https://an-img.oss-cn-hangzhou.aliyuncs.com/2026/02/09/20260209214118816.png,500,50) - 确定新 master - ![](https://an-img.oss-cn-hangzhou.aliyuncs.com/2026/02/09/20260209214241750.png,600,30) - 验证其中一个哪个变成 master - ![](https://an-img.oss-cn-hangzhou.aliyuncs.com/2026/02/09/20260209214340957.png,750,100) - 验证切主后仍然可写 - ![](https://an-img.oss-cn-hangzhou.aliyuncs.com/2026/02/09/20260209214638757.png,700,140) - 启动旧 master - docker compose up -d redis-master - ![](https://an-img.oss-cn-hangzhou.aliyuncs.com/2026/02/09/20260209214737010.png,400,50) - 旧 master 变成 slave - 最终一致性验证 - ![](https://an-img.oss-cn-hangzhou.aliyuncs.com/2026/02/09/20260209214827689.png,350,70) - 实验:SpringBoot 无感切主 - 验证 Sentiel 当前 master - ![](https://an-img.oss-cn-hangzhou.aliyuncs.com/2026/02/09/20260209220539046.png,600,70) - 配置 Sentinel 连接 - ![](https://an-img.oss-cn-hangzhou.aliyuncs.com/2026/02/09/20260209224129500.png,515,227) - 编写 Controller 验证读写 - ![](https://an-img.oss-cn-hangzhou.aliyuncs.com/2026/02/09/20260209221005722.png,438,412) - 构建镜像 - ![](https://an-img.oss-cn-hangzhou.aliyuncs.com/2026/02/09/20260209222203602.png,370,480) - docker build -t redis-demo . - 切主前写入 - ![](https://an-img.oss-cn-hangzhou.aliyuncs.com/2026/02/09/20260209224307958.png,300,80) - 模拟主库宕机 - docker kill -s KILL $(docker compose ps -q redis-master) - 观察 sentinel 选主 - redis-cli -p 26379 SENTINEL get-master-addr-by-name mymaster - 内存管理 - INFO memory - ![](https://an-img.oss-cn-hangzhou.aliyuncs.com/2026/02/10/20260210104614321.png,438,172) - used_memory: Redis 实际分配的内存 - used_memory_human:人类可读的内粗 - used_memory_rss:进程在 OS 视角占用的物理内存 - used_memory_peak:历史峰值 - mem_fragmentation:碎片比 = rss/used_memory >= 2 碎片偏高 - 上限相关 - ![](https://an-img.oss-cn-hangzhou.aliyuncs.com/2026/02/10/20260210105023351.png,250,40) - maxmemory:代表你给 Redis 的硬上限,等于 0 代表未设置内存上限,Redis 会继续申请内存知道吃光资源,不会触发淘汰侧路 - maxmemory-policy:代表 Redis 达到上限时怎么处理 - 淘汰策略 - allkeys-lfu (强烈推荐,缓存业务首选) - 所有 key 都可能被淘汰 - 适合热点明显的缓存 - allkeys-lru - 适合访问模式更均匀,有最近性的场景 - volatile-ttl - 只淘汰带过期时间的 key - noeviction - 拒绝写入,适合强一致性 - 实验:设置 maxmemory + 不同淘汰策略对比 - 设置较小的 maxmemory - redis-cli -a 123456 CONFIG SET maxmemory 10mb - 测试策略 - redis-cli -a 123456 FLUSHDB - redis-cli -a 123456 CONFIG SET maxmemory-policy noeviction - 持续写入大 value - ![](https://an-img.oss-cn-hangzhou.aliyuncs.com/2026/02/10/20260210123915656.png,700,200) - 观察指标 - redis-cli -a 123456 INFO stats | egrep "evicted_keys|keyspace_hits|keyspace_misses" - redis-cli -a 123456 INFO memory | egrep "used_memory_human|maxmemory_human|mem_fragmentation_ratio" - 实验:LFU vs LRU 对热点的保护效果 - 目标:构造一个热点 key 与大量冷 key,验证 LFU 更能保护热点 - 策略设置 - redis-cli -a 123456 CONFIG SET maxmemory-policy allkeys-lfu - 写入热点 key - redis-cli -a 123456 SET hot "1" - 增加访问频率 - for i in $(seq 1 20000); do redis-cli -a 123456 GET hot > /dev/null; done - 写入大量冷 key - 检查 hot 是否存在 - 实验:内存碎片 fragmentation 观察与整理 - 制造碎片 - 反复创建/删除很多不同大小的 value - Hash/List 不断增长、缩小 - 缓解手段 - 避免频繁大幅变更 value 大小 - 拆分 bigkey - 合理设置 maxmemory,预留空间 - Redis 4+ 可以考虑 memory purge - 实验:BigKey 检测与治理 - 构造 bigkey - ![](https://an-img.oss-cn-hangzhou.aliyuncs.com/2026/02/10/20260210125423939.png,785,132) - 查看内存 - ![](https://an-img.oss-cn-hangzhou.aliyuncs.com/2026/02/10/20260210125448129.png,425,226) - 粗定位 --bigkeys (抽样/扫描) - 看到按类型统计的最大 key - 会扫描 keyspace,生产慎用 - ![](https://an-img.oss-cn-hangzhou.aliyuncs.com/2026/02/10/20260210160144500.png,700,400) - 精确测量 MEMORY USAGE - redis-cli -a 123456 MEMORY USAGE big:hash - 观察 BigKey 对延迟的影响 - 打开延迟监控 - redis-cli -a 123456 CONFIG SET latency-monitor-threshold 10 - 删除 bigkey - 查看延迟事件 - redis-cli -a 123456 LATENCY LATEST - 危害 - 阻塞主线程 - 复制/持久化压力 - 网络抖动 - 治理方案 - 拆分设计 附录 缓存系统实战 缓存系统实战 application.properties: ...

二月 6, 2026

二叉树的层序遍历

二叉树的层序遍历 题目 思路 put root into a queue queue is not empty 2.1. size = queue.size(), this is exactly how many nodes are in the current level. 2.1. repeat size times: * pop one node from queue * add its value to level * add left and right child Java 1 2 3 4 5 6 7 8 9 10 11 12 13 14 15 16 17 18 19 20 21 22 23 24 25 class Solution { public List<List<Integer>> levelOrder(TreeNode root) { List<List<Integer>> res = new ArrayList<>(); if (root == null) { return res; } Deque<TreeNode> q = new ArrayDeque<>(); q.offer(root); while(!q.isEmpty()) { int size = q.size(); List<Integer> level = new ArrayList<>(size); for (int i = 0; i < size; i ++) { TreeNode node = q.poll(); level.add(node.val); if (node.left != null) q.offer(node.left); if (node.right != null) q.offer(node.right); } res.add(level); } return res; } }

二月 6, 2026

二叉树的直径

题目 Solution The longest path through that node equals: left subtree depth + right subtree depth. the longest path must pass through some node as a highest point. ...

二月 6, 2026

将有序数组转换为二叉搜索树

将有序数组转换为二叉搜索树 题目 思路 A height-balance BST is achieved by always picking the middle element as the root. The left and right subtree sizes differ by at most 1. ...

二月 6, 2026

验证二叉搜索树

验证二叉搜索树 题目 思路 root starts with (-inf, +inf) left child inherits (min, root.val) right child inherits (root.val, max) Java 1 2 3 4 5 6 7 8 9 10 11 12 13 14 15 16 17 class Solution { public boolean isValidBST(TreeNode root) { return dfs(root, Long.MIN_VALUE, Long.MAX_VALUE); } private boolean dfs(TreeNode node, long low, long high) { if (node == null) { return true; } long v = node.val; if (v <= low || v >= high) { return false; } return dfs(node.left, low, v) && dfs(node.right, v, high); } }

二月 6, 2026

148-排序链表

题目 思路 找中点并每次拆分链表 递归排序 合并两个有序链表 Java 1 2 3 4 5 6 7 8 9 10 11 12 13 14 15 16 17 18 19 20 21 22 23 24 25 26 27 28 29 30 31 32 33 34 35 36 37 38 39 40 41 class Solution { public ListNode sortList(ListNode head) { if (head == null || head.next == null) { return head; } ListNode mid = splitMid(head); ListNode left = sortList(head); ListNode right = sortList(mid); return merge(left, right); } private ListNode splitMid(ListNode head) { ListNode slow = head, fast = head, prev = null; while (fast != null && fast.next != null) { prev = slow; slow = slow.next; fast = fast.next.next; } prev.next = null; return slow; } private ListNode merge(ListNode a, ListNode b) { ListNode dummy = new ListNode(0), p = dummy; while (a != null && b != null) { if (a.val <= b.val) { p.next = a; a = a.next; } else { p.next = b; b = b.next; } p = p.next; } p.next = (a != null) ? a : b; return dummy.next; } }

二月 5, 2026

LRU 缓存

题目 思路 O(1) 查询 (哈希表) 记录最近使用顺序 (链表) 需要组合哈希表 + 双向链表 Java 解法 1 2 3 4 5 6 7 8 9 10 11 12 13 14 15 16 17 18 19 20 21 22 23 24 25 26 27 28 29 30 31 32 33 34 35 36 37 38 39 40 41 42 43 44 45 46 47 48 49 50 51 52 53 54 55 56 57 58 59 60 61 62 63 64 65 66 67 68 69 70 71 class LRUCache { private static class Node { int key, val; Node prev, next; Node(int k, int v) { key = k; val = v; } } private final int capacity; private final Map<Integer, Node> map = new HashMap<>(); private final Node head = new Node(0, 0); private final Node tail = new Node(0, 0); public LRUCache(int capacity) { this.capacity = capacity; head.next = tail; tail.prev = head; } public int get(int key) { Node node = map.get(key); if (node == null) { return -1; } moveToHead(node); return node.val; } public void put(int key, int value) { Node node = map.get(key); if (node != null) { node.val = value; moveToHead(node); return; } Node n = new Node(key, value); map.put(key, n); addAfterHead(n); if (map.size() > capacity) { Node lru = removeTail(); map.remove(lru.key); } } private void moveToHead(Node node) { remove(node); addAfterHead(node); } private void addAfterHead(Node node) { node.prev = head; node.next = head.next; head.next.prev = node; head.next = node; } private void remove(Node node) { node.prev.next = node.next; node.next.prev = node.prev; } private Node removeTail() { Node node = tail.prev; remove(node); return node; } }

二月 5, 2026

对称二叉树

题目 思路 dfs 值相等,且 left.left 对 right.right,left.right 对 right.left bfs ...

二月 5, 2026

二叉树的中序遍历

题目 思路 递归解法 递归遍历左子树 访问当前答案 递归遍历右子树 迭代 + 栈解法 ...

二月 5, 2026