实验元数据 (Meta Data)
实验编号/标题:例如:LLM-智能翻译助手-实验
日期:2026-02-23
所属领域/标签:例如:#LLM
🎯 实验前:假设与目标 (Plan)
当前问题 (Problem):我需要实践下基础的 LLM API 调用
实验目标 (Objective):
构建一个命令行翻译工具,支持:
- 自动语言检测 — 不需要用户指定源语言
- 高质量翻译 — 带置信度评分和替代翻译方案
- 上下文感知 — 可以传入语境提示(如"这是法律文本")
- 流式输出 — 翻译结果逐字显示,提升用户体验
- 批量翻译 — 支持读取文件批量处理
- 多模型切换 — 支持在 Claude / OpenAI 之间切换
核心假设 (Hypothesis):
🧪 实验中:执行步骤与变量 (Do)
准备工作/工具:
项目结构:
| |
安装依赖
| |
- anthropic — Anthropic 官方 SDK,用于调用 Claude API
- openai — OpenAI SDK,用于对比学习
- pydantic — 数据校验,Agent 开发的标配
- python-dotenv — 管理环境变量(API 密钥)
- rich — 终端美化输出(进度条、彩色文字)
- typer — 命令行工具框架
配置 API 密钥
| |
执行步骤 (Log):
定义数据模型
为什么先写模型? 在 Agent 开发中,定义清晰的数据结构是第一步。它决定了 LLM 需要输出什么、下游系统如何消费数据。这就是 “Structured Output” 的起点。
| |
- Field(description=…) — 这些描述最终会成为 prompt 的一部分,帮助 LLM 理解每个字段的含义
- Enum 约束 — 限制 confidence 只能是 high/medium/low,防止 LLM 输出随意值
- default_factory=list — 确保 alternatives 字段有默认空列表
- max_length=3 — 约束替代翻译数量,控制输出长度和成本
Prompt 设计
这是整个项目最重要的部分。 Prompt 设计的质量直接决定了翻译效果。
| |
- 角色设定(System Prompt 第一句)— 告诉模型"你是什么",建立行为框架
- 明确规则 — 用编号列表给出约束,减少模型的自由发挥空间
- 输出格式锁定 — 直接给 JSON 示例,这比"请输出 JSON"有效得多
- Few-shot 示例 — 用一个具体例子展示期望的输出格式和风格(特别是如何处理俚语)
- Context 注入 — 可选的上下文信息让翻译更准确(如"这是医学文献")
LLM 客户端封装
为什么要封装? 直接散落在代码各处的 API 调用会导致:难以切换模型、无法统一处理错误、无法记录 token 用量。在 Agent 开发中,封装一个 LLM 客户端层是标准做法。
| |
- 重试 + 指数退避 — 所有 API 调用都可能失败,这是生产级代码的基础
- Token 用量追踪 — Agent 的成本控制从这里开始
- JSON 清洗 — LLM 经常在 JSON 外面包一层 markdown,必须处理
- Temperature 策略 — 不同任务需要不同的温度参数
核心翻译器
| |
命令行界面
| |
👁️ 实验后:现象与数据 (Check)
客观记录发生了什么,不要带主观评价。
基本翻译:

带上下文的翻译:

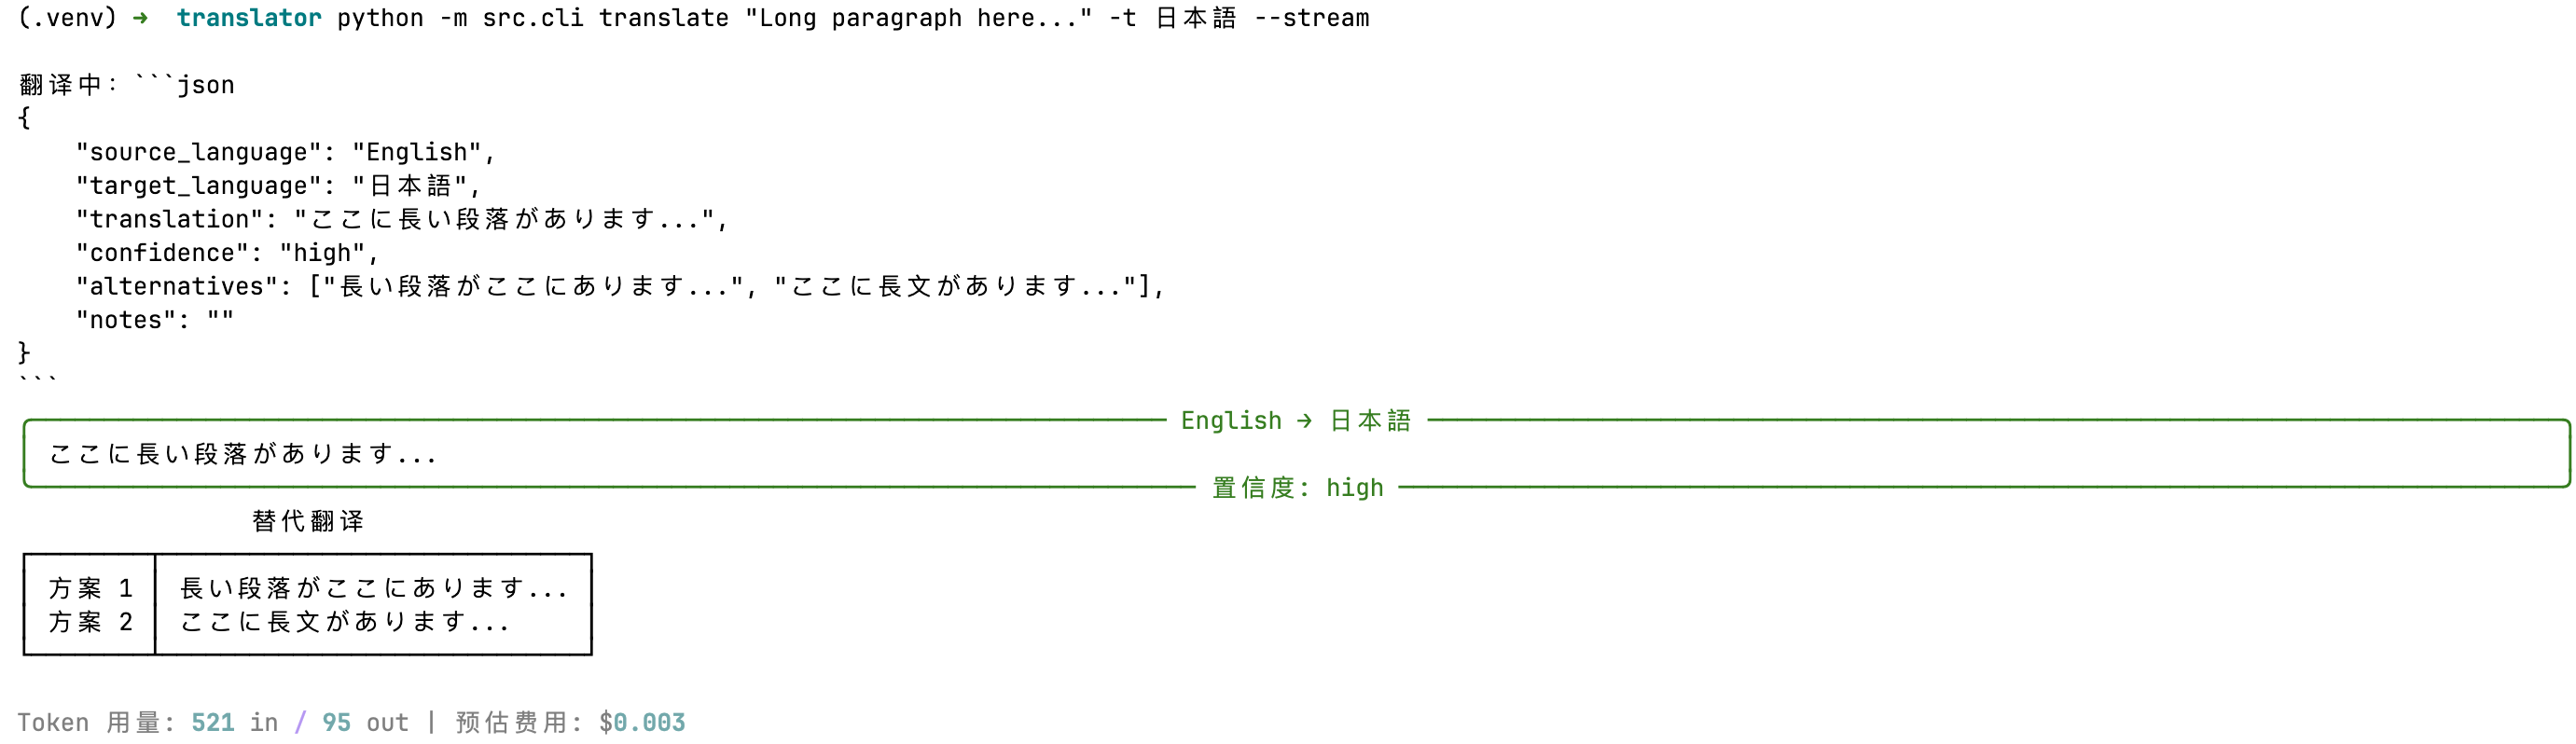
流式输出:
🧠 深度复盘:分析与结论 (Act)
一个基本的 Agent 系统由数据模型、LLM 客户端、Prompt 组成。
同时有一个主类负责串联所有系统从而完成任务。
Q: Structured Output 有哪些实现方式?各有什么优缺点? A: (1) Prompt 约束(本项目方式):灵活但不稳定,需要 JSON 清洗;(2) Function Calling / Tool Use:API 层面保证结构,最可靠;(3) JSON Mode(OpenAI 特有):保证输出是 JSON 但不保证 schema;(4) Constrained Decoding(如 Outlines 库):在采样阶段强制 schema,100% 可靠但只适用于自部署模型。
Q: 流式输出和非流式输出分别适合什么场景? A: 流式适合面向用户的交互场景(聊天、翻译预览)、长文本生成。非流式适合后台任务、需要完整 JSON 解析的场景、批量处理。Agent 的中间步骤通常用非流式(需要完整解析),最终回复用流式(用户体验)。
Q: 如何控制 LLM API 调用的成本? A: (1) Token 用量监控(本项目已实现);(2) 模型路由 — 简单任务用小模型(Haiku),复杂任务用大模型(Opus);(3) 缓存 — 相同输入直接返回缓存结果;(4) Prompt 精简 — 减少不必要的上下文;(5) 批量 API(Anthropic Message Batches)— 异步批处理享受折扣价。
Q: temperature 参数如何选择?
A: 取决于任务的确定性需求。翻译、数据提取、分类 → 00.3;一般对话、总结 → 0.50.7;创意写作、头脑风暴 → 0.8~1.0。Agent 中不同节点的 temperature 应该不同:规划节点可以高一些(探索更多方案),执行节点应该低(减少随机性)。
下一步行动 (Next Actions):
✅ 验证通过,纳入标准流程。
🔄 验证失败,修改假设,开启下一次实验(EXP-002)。
❓ 产生新问题:[记录新问题]